You may notice your cherry tree suffering from yellowing leaves and wilting branches after heavy rain, which is why you need to know how to stop root rot in a cherry tree after heavy rain. This often results from excess moisture in the soil, leading to mushy roots that can cause significant damage. If left unaddressed, this issue gets worse and weakens the plant, but you can still fix it by checking the drainage and adjusting your watering routine to improve conditions.
Step 1 – Remove Waterlogged Soil from Cherry Roots
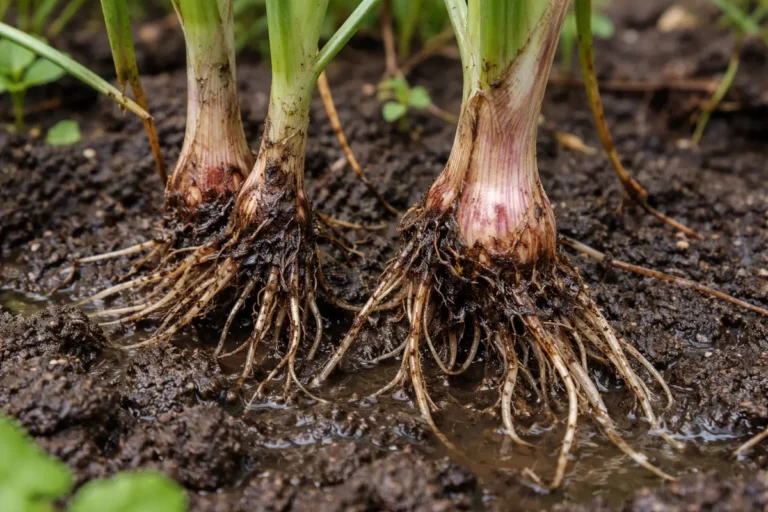
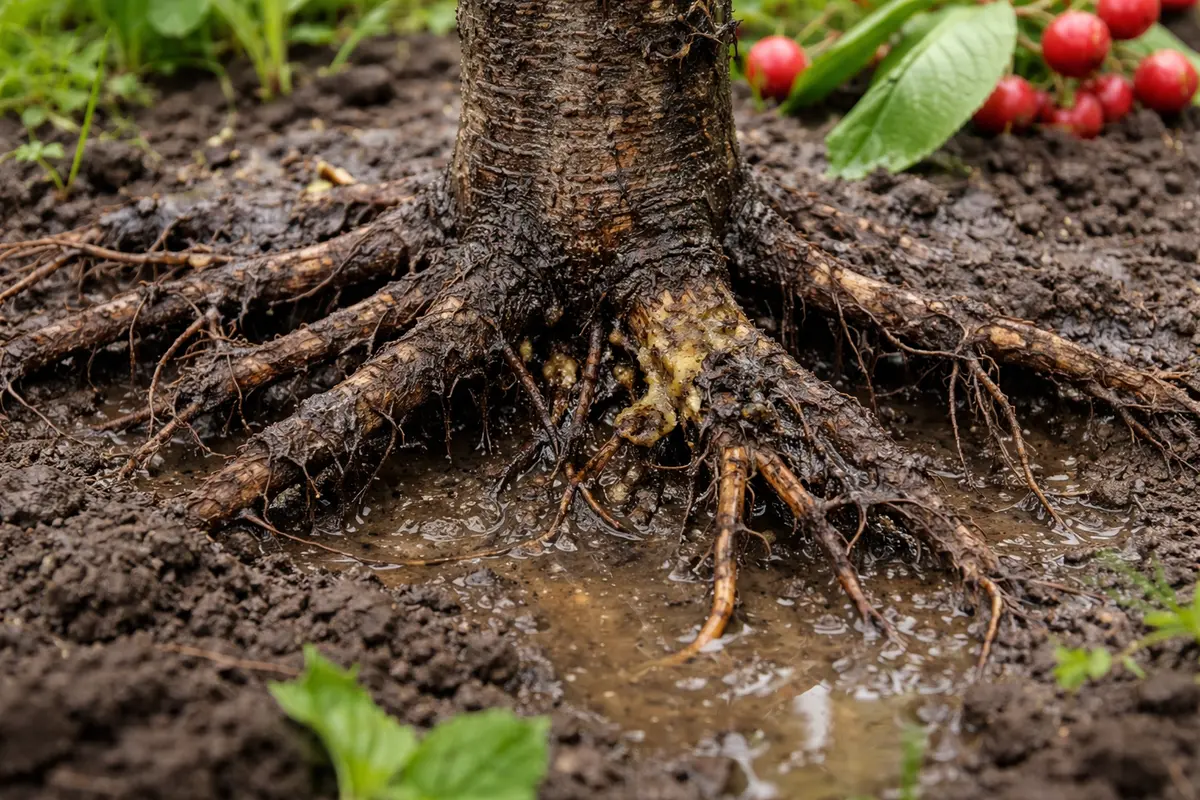
Start by digging around the base of the cherry tree to remove waterlogged soil. You will observe that the soil texture becomes less muddy and more crumbly, indicating improved drainage. This action reduces the risk of further root suffocation and limits the spread of rot. If possible, aim to remove at least 6-8 inches of soil depth, focusing on areas where water tends to pool, especially during heavy rainfall. To ensure thoroughness, dig into the soil until you can see the topmost roots; look for signs of health including firmness and a lack of discoloration.
Waterlogged soil creates a damp environment where harmful bacteria and fungi thrive, obstructing the roots’ oxygen supply and leading to rot. Cherry trees are particularly susceptible during periods of excessive rainfall; their roots require adequate airflow to function properly. Removing the saturated soil immediately helps in restoring the much-needed oxygen to the roots, fostering a healthier environment. After re-exposing the roots, they should appear firm and free of any dark, mushy sections that indicate rot. If you notice that the roots appear soft or discolored, act quickly to trim away the unhealthy portions, as they won’t recover.
A common mistake gardeners make at this stage is neglecting to check the soil’s moisture level before digging. If the soil appears dry when touched, despite recent rain, digging could damage healthy roots. Taking the time to assess soil moisture through feel or by using a moisture meter can make a significant difference in recovery, ensuring only the affected areas are addressed. If you feel resistance while digging, this indicates compacted soil, which may require additional aeration techniques. In such cases, use a garden fork to gently aerate the soil without harming any roots that might still be viable, promoting better drainage.
Step 2 – Assess Soil Composition Affecting Cherry Trees
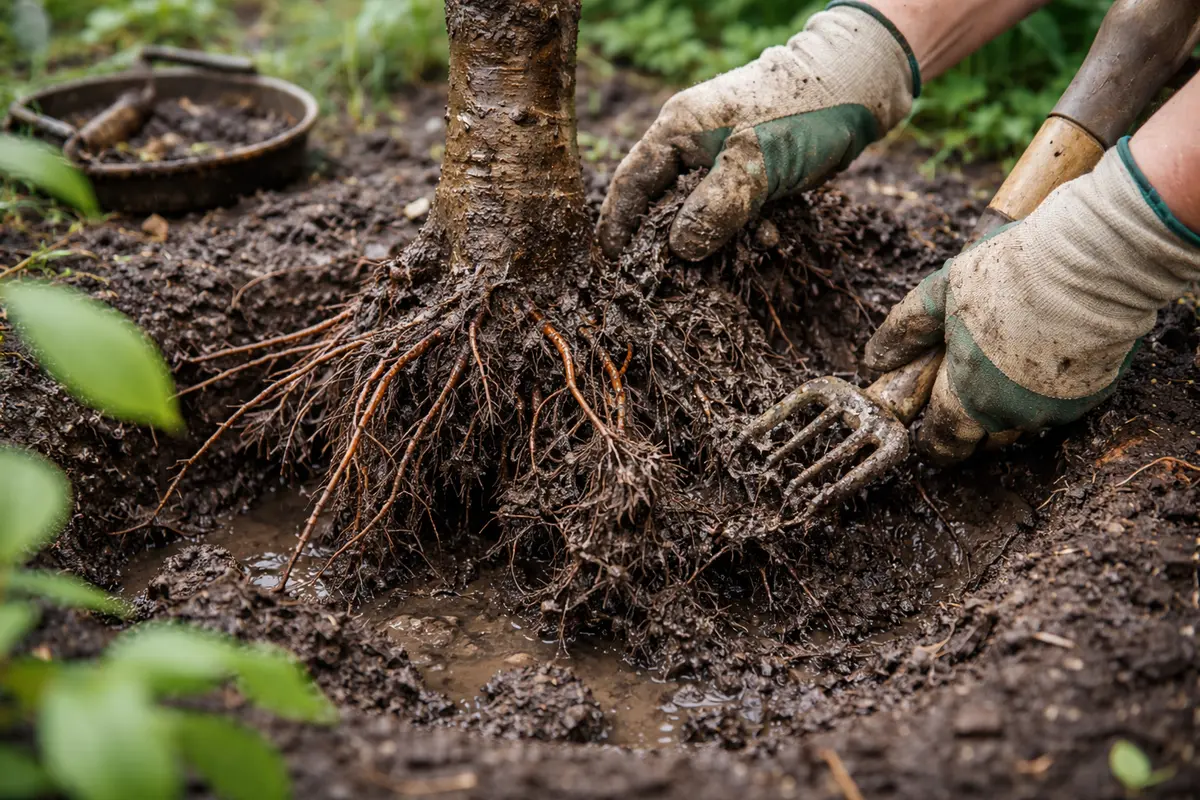
Examine the soil composition around the cherry tree to identify compact areas or clay-heavy patches. You will find that changes in soil texture can indicate specific issues, such as poor drainage or compaction. It’s crucial to observe that compacted soil may feel dense and hard, while healthier soil should crumble easily between your fingers. If you can easily break the soil apart, it’s a sign of good aeration, while difficulty in doing so suggests immediate attention is needed to improve root health.
Compact or clay-rich soils exacerbate water retention, making them a breeding ground for root rot. Additionally, these conditions inhibit aeration for healthy root development. Recognizing the soil structure and its drainage capability helps prevent future moisture-related issues and provides insight into necessary amendments. Monitor the soil for an earthy smell, which signals that beneficial microbes are present; however, a sour odor points to anaerobic conditions detrimental to the roots. If you encounter the latter, it’s vital to act promptly by mixing in organic amendments to improve soil quality.
If the soil appears particularly dense or emits a sour odor, this indicates anaerobic conditions that can be detrimental for cherry roots. Consider amending it with organic matter like compost or well-rotted manure, which improves drainage and fosters beneficial microbial activity. A successful amendment should include roughly 1 part organic matter to 3 parts native soil, ensuring proper integration. Conversely, if your soil feels loose, dry, and crumbly, excessive watering could exacerbate the root rot. In such cases, you should scale back on irrigation to avoid further saturating the root zone, ensuring the treatment remains effective to promote recovery. Continuous monitoring is key here; test the soil every week to adjust your watering based on observed moisture levels.
Step 3 – Apply Root Stimulator for Cherry Recovery
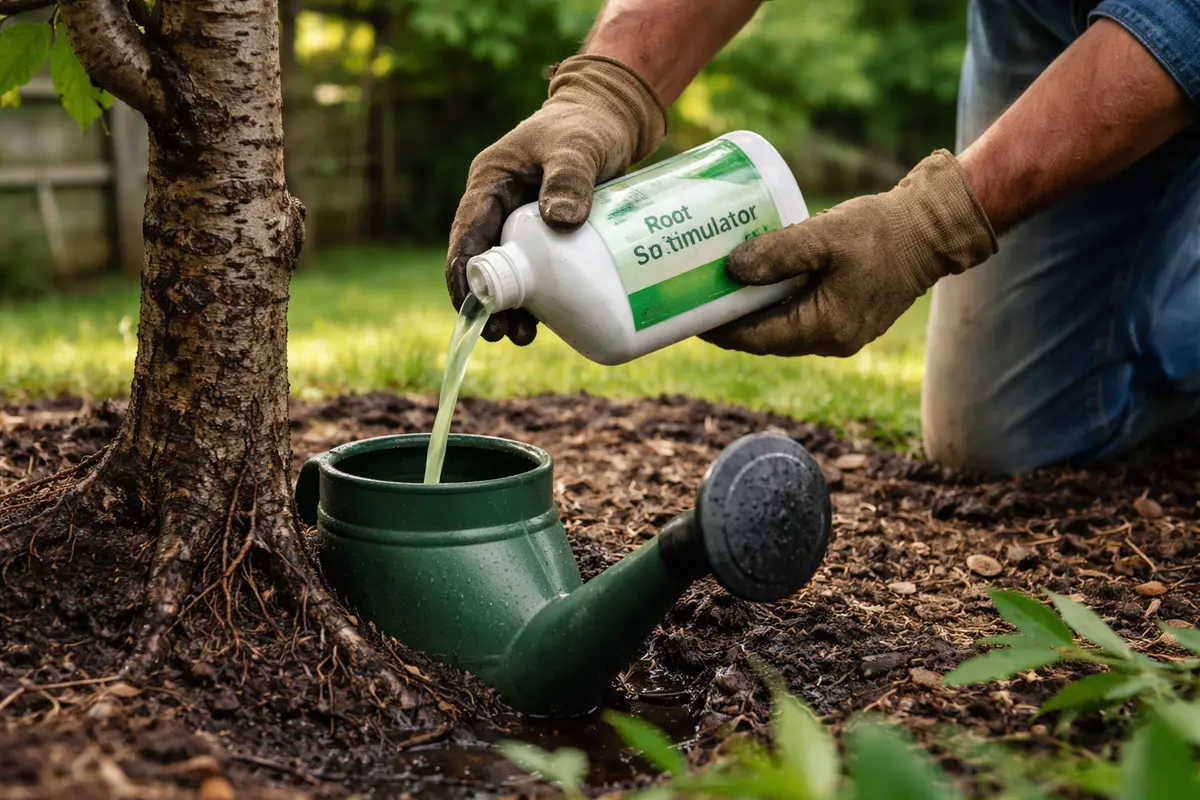
Apply a root stimulator treatment to promote healthy root regrowth. You should notice that the cherry tree begins to perk up, with leaves appearing greener and more robust within days. The application should ideally follow any soil corrections you made, ensuring the treatment has a favorable environment to act upon. Apply the root stimulator directly to the base of the tree, following the manufacturer’s recommendations, which often suggest using 1 to 2 ounces of the product diluted in a gallon of water for effective absorption. This step is essential for rejuvenating the tree’s health and restoring its vitality, as it facilitates quicker recovery following saturated conditions.
Root stimulators often contain hormones that encourage new root development, thus leading to improved nutrient uptake and overall plant health. These treatments aid the tree in recovering from the stress caused by saturated conditions while minimizing the risk of further disease. Optimal results are generally seen when applied consistently over the first few weeks after addressing soil issues, often requiring repeated applications bi-weekly until the tree shows signs of stability. Daily observations during this phase will be beneficial; look for signs of new growth as confirmation of recovery.
A common pitfall during this recovery phase is over-application of stimulant products, which can lead to nutrient burn, further complicating recovery. Stick to the recommended usage on the product label and monitor the tree closely during the recovery period. Signs of nutritional stress include leaf edge browning or delayed new growth, indicating that the concentration of fertilizer may need to be reduced. If symptoms of wilting continue or worsen shortly after treatment, it may signal that root damage is more severe than initially estimated, necessitating further action or consultation with a professional arborist. If the tree shows no improvement after a week of treatment, it is advisable to stop applications and reassess the root conditions.
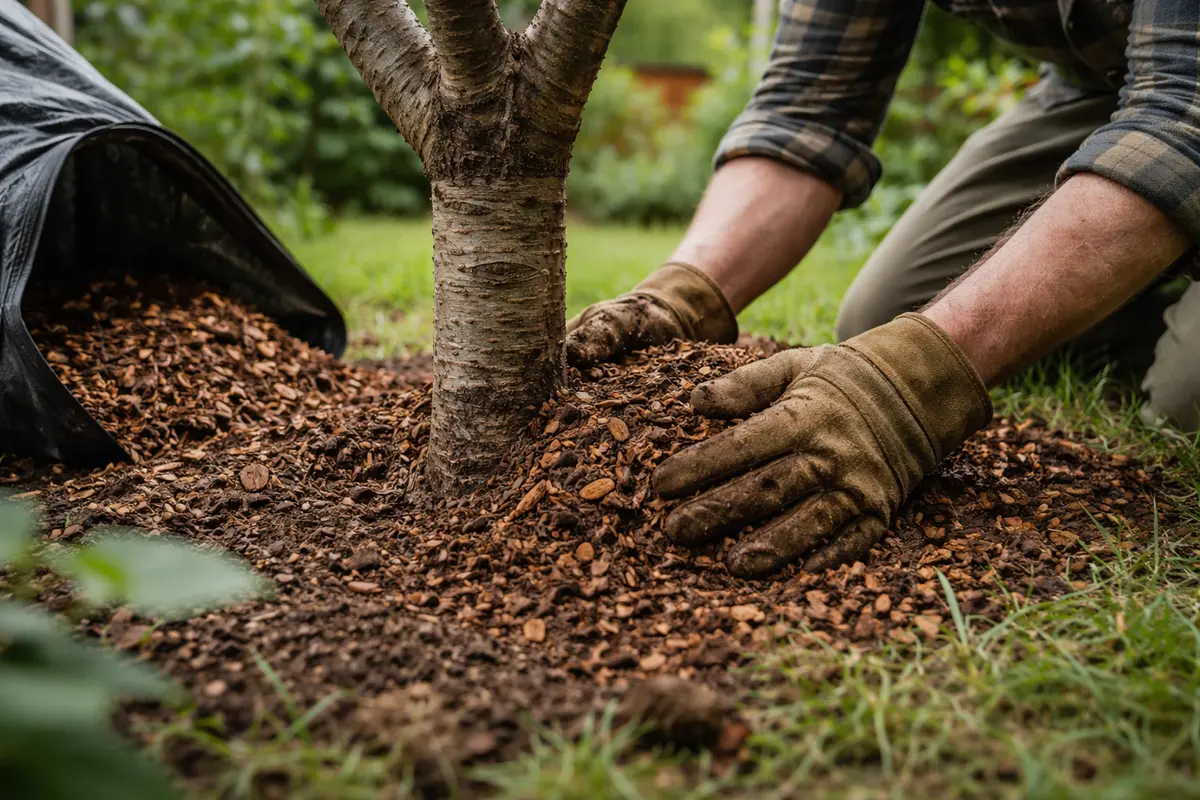
Step 4 – Mulch Around Cherry Tree for Rain Protection
Start by ensuring proper drainage around your cherry tree by elevating the soil level and adding drainage rocks or gravel. This action will help prevent water from pooling around the roots after heavy rain, reducing the risk of root rot. An effective method is to create a basin-shaped mound around the tree, tapering the slope downward from the trunk, allowing excess water to flow away.
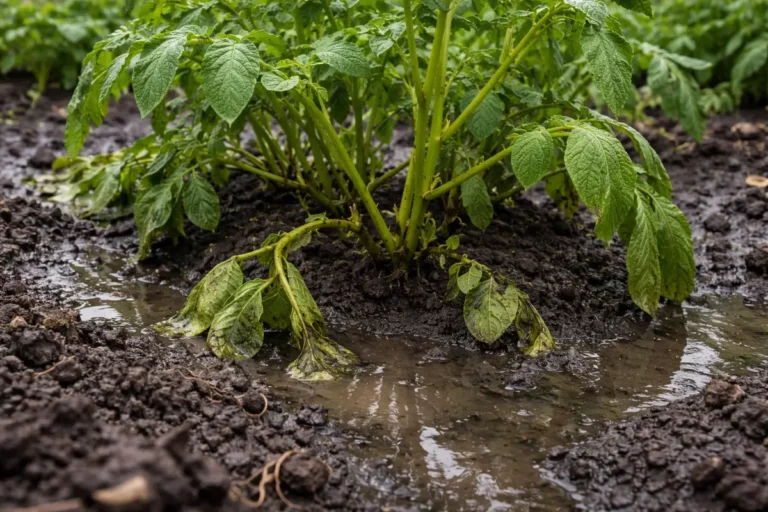
Excess moisture in the soil, especially after heavy rainfall, creates an environment ideal for pathogens that cause root rot. By improving drainage, you limit stagnant water, a critical factor contributing to root decay. If you notice your tree standing in water following rains, it’s a clear sign that drainage needs immediate attention; if not, check for soil compaction or other obstructions. Implementing a layer of organic mulch helps retain moisture evenly while preventing rapid evaporation, which can be particularly beneficial in hot weather.
In early spring, when rainfall is frequent, increase the height of the planting mound around the tree to further enhance drainage. Additionally, consider adding a layer of mulch to the base to regulate moisture levels; however, be cautious not to let it touch the trunk, as that can trap moisture against it. The ideal mulch thickness around the base of the tree is 3 to 4 inches, which minimizes weed growth while still allowing air and moisture to penetrate effectively. Pay attention to the type of mulch used; organic materials such as wood chips or bark fines allow for moisture regulation while improving soil structure as they decompose.
During rainy seasons, be vigilant about adjusting your mulch type or depth. For instance, using straw, wood chips, or pine needles can be beneficial as these materials allow rainwater to filter down while regulating soil moisture levels. Regularly check the mulch layer thickness, ensuring it remains consistent; it should be replenished as necessary, particularly after heavy rain or winds that may shift mulch away from the tree’s base. This vigilance helps maintain a suitable micro-environment around the roots, facilitating sustained health across seasons. Failing to keep the mulch in good condition can lead to surface evaporation, causing unnecessary fluctuations in soil moisture that stress the tree.
Step 5 – Inspect Cherry Leaves for Signs of Decline
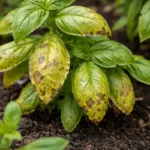
Check the cherry tree leaves every few days for indications of new yellowing or wilting. What you should observe are the leaves firming up and exhibiting vibrant green colors, which indicates that the tree is recovering well. Regular inspection will help you catch any recurrence of yellowing or wilting early, which is crucial to preventing further harm. Early signs of new growth or leaf expansion can affirm that your previous interventions are yielding positive results. Documenting observations along this recovery process can provide insight into patterns that may help future preventive actions.
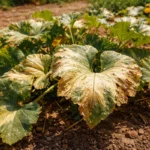
A healthy cherry tree should produce vibrant, green leaves, while any resurgence of yellowing or browning is a clear sign that further issues may be returning. Inspecting the leaves’ undersides for pests or fungal growth is equally important, as these additional stressors can complicate recovery efforts. Look for spots, webbing, or unusual growth patterns, as they can indicate pest infestations that require swift management measures. Early detection enables prompt corrective actions, such as targeted pest treatment or adjustments to care routines. If pest activity is suspected, consider using an appropriate pesticide or insecticidal soap to eliminate them, while being careful not to over-apply, which can stress the plant.
If you notice a re-emergence of yellow or wilting leaves, it may indicate that further root damage has occurred or that another underlying issue needs to be addressed, such as nutrient deficiency or pH imbalance. Nutrient deficiencies can often lead to specific leaf discolorations, requiring soil tests to guide appropriate fertilization. In such cases, reevaluate your soil management strategies, check for new signs of pests or diseases, and consider a second application of root treatment if recovery lags. If conditions continue to worsen or spread to more branches, consulting a professional may become necessary to avert complete tree loss and ensure effective recovery strategies are being employed. Each week, set aside a few minutes to thoroughly document any changes noticed on the leaves; this tracking can assist in isolating ongoing problems more efficiently.
FAQ
How long will it take for my cherry tree to recover from root rot?
Recovery time for a cherry tree can vary, but generally, you can expect signs of improvement within 2-4 weeks after implementing corrective measures. Factors such as soil health, environmental conditions, and tree age play significant roles in the timeline. You may observe noticeable new growth and greener leaves indicating active recovery once conditions stabilize, alongside improved overall vigor of the tree. If no improvement is seen within this timeframe, it may be necessary to reassess your treatment strategy or consult a professional.
Can root rot spread to other trees in the area?
Yes, root rot can spread to nearby trees if conditions are favorable for fungal growth and if roots intertwine. It is critical to manage the environment around your cherry tree by improving drainage and monitoring soil moisture levels. If you notice symptoms of rot in multiple trees, consider restricting water access to prevent cross-contamination through shared root systems, ensuring to address any stagnant water pools that may also contribute to this issue. Be proactive; apply preventative treatments and ensure all nearby trees are monitored for similar symptoms.
Should I remove affected leaves or branches from my cherry tree?
Yes, removing affected leaves and branches is advisable to prevent disease spread and improve air circulation. Sanitize your pruning shears after use to avoid introducing pathogens to healthy parts of the tree. Observing proper pruning techniques enhances recovery efforts; cutting back dead or dying parts can redirect energy toward healthy growth, allowing the tree to focus its resources on recuperation rather than sustaining damaged tissues. Always prune during dry weather to minimize the risk of further infection, and ensure cuts are made at an angle for optimal healing.