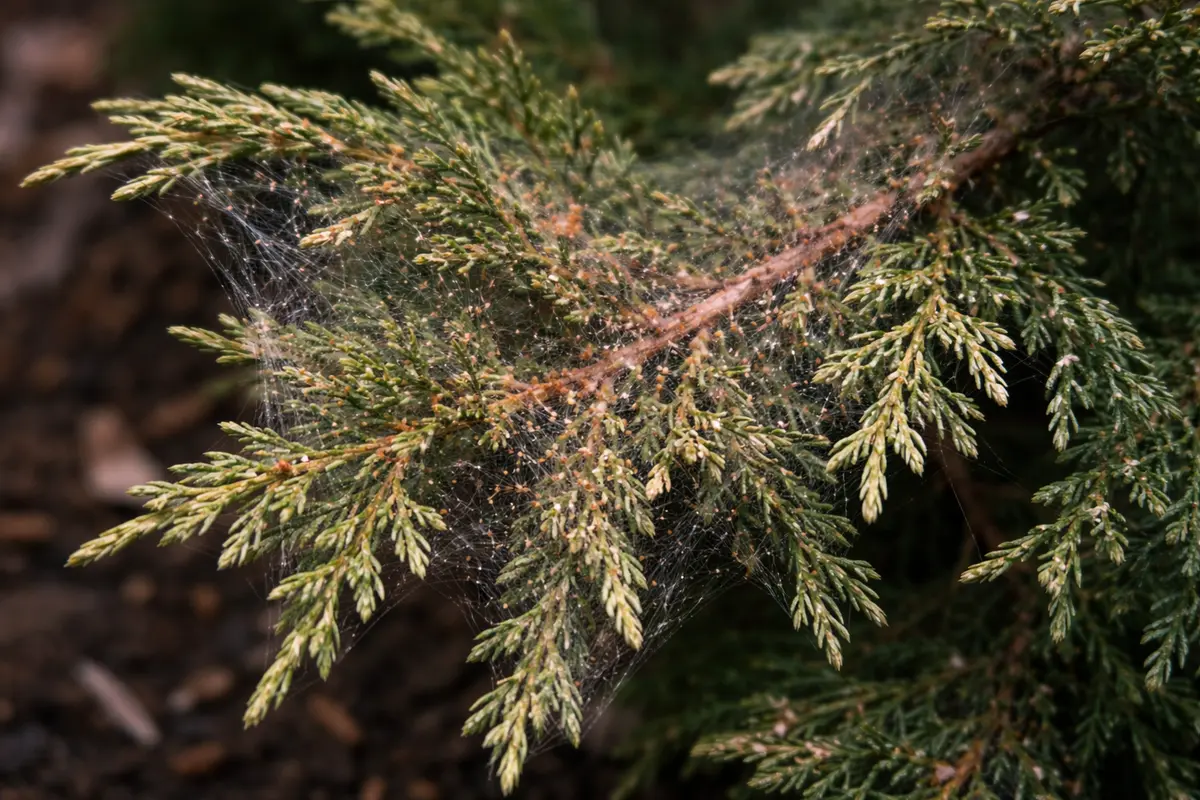
You may notice a fine webbing and discoloration on your junipers during winter, which is why you need to know how to stop spider mites on junipers in winter. These pests cause yellowing and damage to the foliage as they feed on the plant’s sap, leading to a weakened appearance. If ignored, their presence can spread, ultimately leading to more damage and stalling the plant’s growth, but fixing it is possible now if you check and monitor your plants regularly. Addressing this issue promptly is crucial for ensuring a healthy landscape and avoiding long-term damage to your junipers.
Step 1 – Spray Junipers with Insecticidal Soap
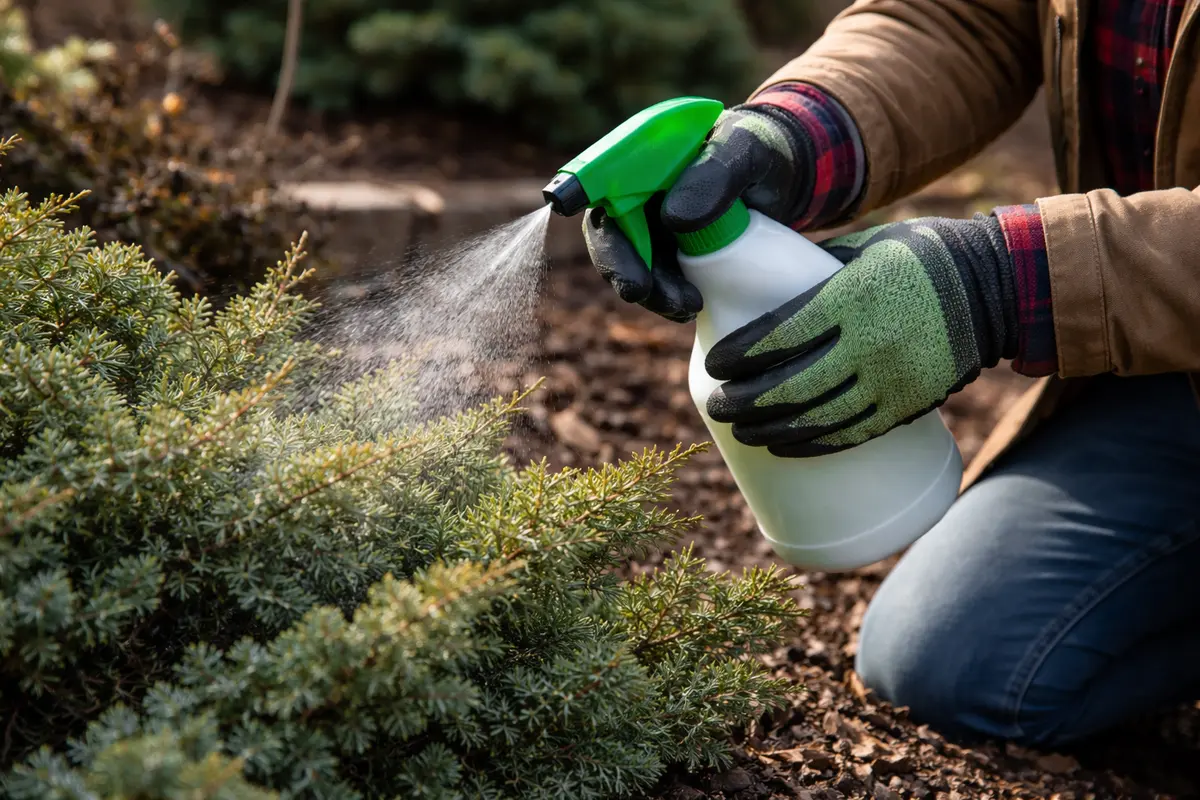
Begin by applying insecticidal soap to the affected areas of your junipers. You will start to see the spider mites dying off within a few hours, as the treatment suffocates them on contact and disrupts their cellular structure. This first step is essential because immediate action reduces the chance for the mites to reproduce and cause further damage. To apply effectively, mix the insecticidal soap according to package instructions, usually diluting it with water to achieve the desired concentration—typically around 2 to 3 tablespoons per quart of water.
Insecticidal soap works effectively against spider mites because it penetrates the soft outer layer of these pests, disrupting their ability to respirate. Timing is crucial; early winter is particularly susceptible to infestations, making it vital to act swiftly. You should cover every part of the plant thoroughly, focusing on areas where spider mites are most likely to hide, like the undersides of leaves. Pay particular attention to new growth, which is more vulnerable; spider mites thrive there, causing rapid damage. This method is crucial to employ promptly; spider mites can reproduce rapidly, increasing damage to the plant. Treating your junipers early in the winter season, especially during dry spells when these pests thrive, will help prevent a larger infestation. Make sure to apply under milder temperatures to prevent plant burn; applying during temperatures of 60°F (15°C) or higher is ideal and reduces the risk of phytotoxicity.
A common mistake many gardeners make is not covering the undersides of the leaves adequately, where spider mites often hide. If you miss this step, the soap won’t be effective at curbing their populations. Take your time to spray every inch of foliage without rushing, as many will only focus on the more visible parts of the plant. Another key factor is applying the insecticidal soap during temperatures that exceed 60°F (15°C); during colder conditions, the soap can potentially freeze or become ineffective upon application. Spraying during late afternoon when the temperatures are warmer is usually ideal. If the weather dips unexpectedly after treatment, it may leave the junipers vulnerable to additional stress factors. Monitor the weather for the next few days; if cold fronts are predicted, consider reapplying after a day or two for added protection.
Step 2 – Analyze Spider Mite Damage on Junipers
Inspect the leaves of your junipers closely for webbing or stippling damage caused by the spider mites. You will notice a clearer understanding of the extent of damage and whether more intervention is necessary. A thorough inspection should occur within a week of treatment to document any visible changes in pest populations. Form a systematic approach to your inspection; visually scan branches in sections, looking for symptomatic leaves and debris that could hide additional spider mite nests.
To gauge the severity of a spider mite infestation, look for symptoms such as tiny yellow or brown spots forming on the leaves and fine webbing, which indicates spider mite activity. If left untreated, you might notice that entire branches begin to wilt, and leaves may droop more severely as stress accumulates. Recognizing these signs will allow you to adjust your care strategy appropriately and limit further infestations. It’s also important to note that leaf curling and premature needle drop are additional symptoms that can showcase the stress levels of your junipers. Pay close attention to changes over time; if the mite populations appear stable or increasing, consider alternate interventions. Additionally, documenting damage with photos can help you monitor progress and make informed decisions.
If you find excessive damage, such as browning of the leaves that shows no signs of recovery, consider increasing the frequency of treatments or introducing predatory mites, which can effectively lower spider mite populations. On the other hand, if you only notice light damage on certain leaves, simply removing those leaves can prevent further spread. This pruning should be immediate, as delaying it risks exposing the rest of the plant to increasing populations. Always check for signs of secondary infections, as damaged plants can also attract fungal issues. Girdling or most severely damaged branches might require complete removal to protect overall plant health; make cuts at a joint to promote healing without injuring surrounding tissues.
Step 3 – Water Junipers Deeply to Revive Them
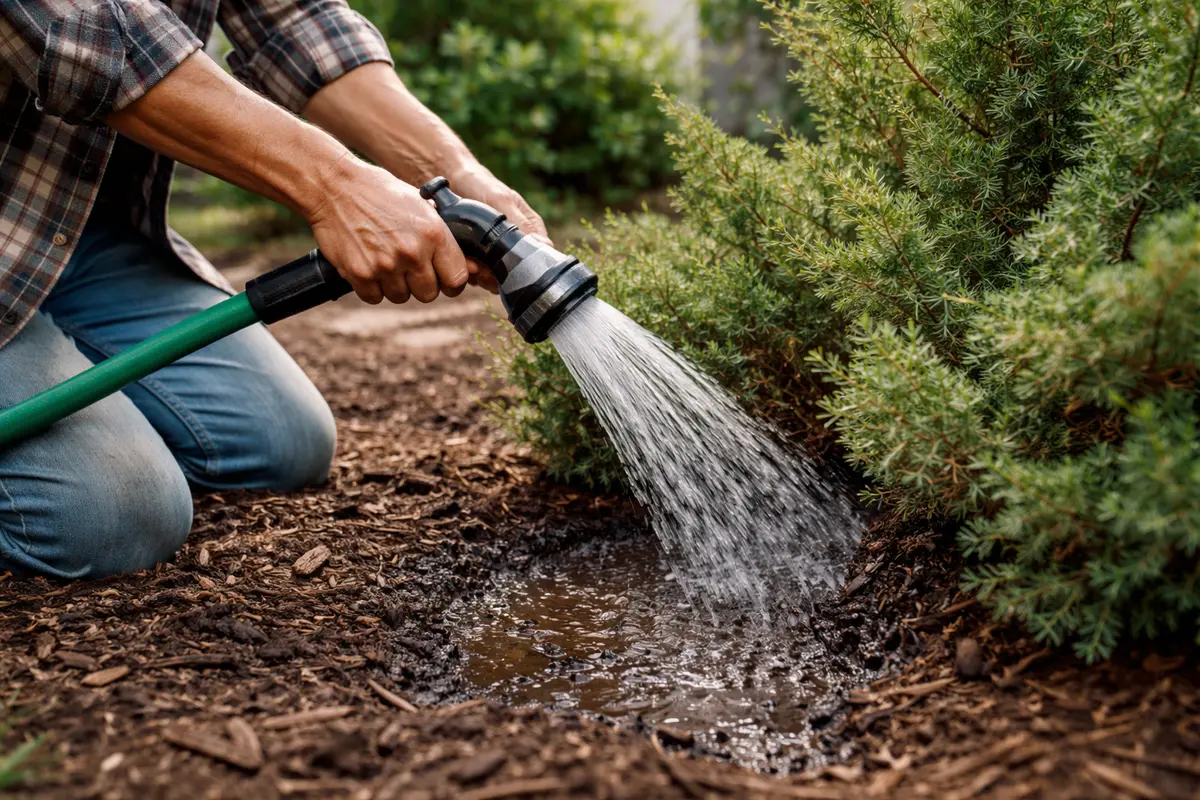
Water your junipers deeply to revitalize them after applying treatments. You should see improved turgor in the leaves within a few hours, as they begin to perk up and regain their vibrant color. Deep watering is crucial, reaching at least 12 inches into the soil, to encourage healthy root growth and flush out residual insecticidal soap or possible mites that might still be lingering. Use a soaker hose or high-volume watering technique, ensuring the soil is saturated evenly around the root zone.
By ensuring adequate hydration, your junipers will be better equipped to withstand stress and pests during their winter dormancy. A hydrated plant can resist further pest issues and maintain overall vigor. In addition, proper drainage is essential, as stagnant water can encourage root rot, which would further weaken the plant. Conduct a quick test by inserting your finger into the soil; if it feels damp beyond the first inch, you might have overwatered. If soil remains drenched for longer than 24 hours, immediate action, such as adjusting your watering schedule or improving drainage, is required. Use a shovel to check the soil’s moisture level deeper down and adjust the frequency accordingly; if soil at that depth remains dry, it indicates a need for additional irrigation.
A common mistake at this stage is overwatering, which can lead to root rot, especially in poorly draining soil. Watch for signs of dull leaves, which can be an indicator of over-saturation. Always consider the specific environment around your junipers; for instance, if they are planted in compacted soil, they may require less water overall. In contrast, in sandy soils, moisture can dissipate quickly, requiring more frequent watering. Pay attention to the surrounding environment and allow the top inch of soil to dry out between waterings, especially during colder, wetter months to avoid waterlogging or soil hardness that can impair root systems. Establishing a watering schedule according to the plant’s needs will foster a more resilient root system, ultimately helping prevent pest infestations in the future.
Step 4 – Shield Junipers from Winter Pests
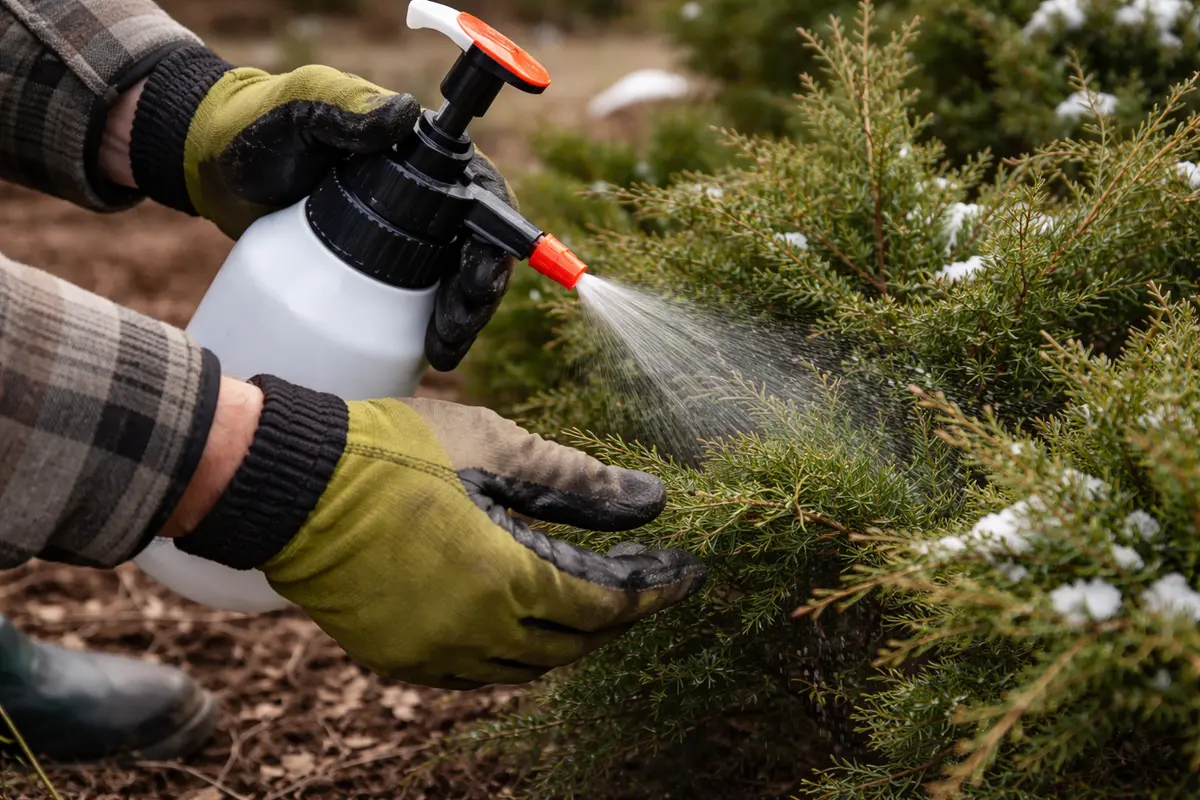
Start by applying insecticidal soap or neem oil to the junipers, targeting the underside of leaves where spider mites reside. This direct action will significantly reduce mite populations, leading to a noticeable decrease in webbing and overall infestation within days.
Dry, warm conditions typically trigger spider mite outbreaks as these pests thrive in low humidity environments. By maintaining adequate moisture in the soil and applying insecticidal treatments during winter, you disrupt their habitat and reduce the likelihood of recurrence. If you notice webs returning, inspect for additional dry spots around the juniper, as these can easily be overlooked.
In winter, consider increasing humidity around the junipers by misting them or adding a humidifier if they are indoors. This adjustment counters the dry air that spider mites love, providing a secondary layer of defense against their resurgence when temperatures fluctuate.
Spider mites thrive in dry, warm conditions, commonly found in indoor or poorly ventilated areas during winter months. By regularly applying neem oil, you disrupt their reproductive cycle and keep humidity levels at a necessary level to deter their return—unlike untreated junipers that may attract these pests undisturbed. Target the entire plant; good coverage is essential on both the top and undersides of leaves. If foliage appears glossy after application, you’ve adequately coated the plant and protected it from pests. Furthermore, timing your applications just before forecasted rains can help reduce the product’s effectiveness, so always apply your treatments when dry weather is secure.
If strong winds or unexpected warmth in winter occur, increase the frequency of neem oil applications to maintain effectiveness. Additionally, consider placing a humidifier nearby during dry spells to further decrease spider mite activity while ensuring the junipers remain resilient through the season. Check the humidity around your plants and adjust tactics accordingly; if it seems too low, focusing on humidity should be a priority. Creating a barrier, like protective horticultural fleece or organic mulching, not only aids in regulating temperature and moisture levels around the junipers but also makes them less attractive to pests. Implementing a regular inspection routine will help catch any issues early before they escalate into larger infestations. Additionally, ensure the junipers receive adequate sunlight; healthy plants thriving in good sunlight will inherently repel spider mites. If possible, position the plants in areas away from potential pest sources like dense underbrush. The objective is to promote longevity and health, effectively minimizing the conditions that lead to these infestations.
During particularly dry spells, be vigilant about monitoring humidity levels—if conditions are too dry, spider mites are more likely to proliferate. Adjust your humidity levels through regular watering and mulching to create a more stable microenvironment around the junipers. In areas of heavy snow, consider covering leaves with breathable fabric to provide insulation while preventing moisture buildup that may foster rot. A common lapse is neglecting these barriers during periods of consistent cold; having a protective layer can make a significant difference in overall plant health. Always check the forecast, as fluctuating temperatures can lead to accidental stress on your junipers. Having strategies prepared in advance will ensure better long-term health and significantly decrease the spider mite risk.
Step 5 – Inspect Junipers Weekly for New Infestations
Check your junipers weekly for any early signs of spider mite activity. You should observe a noticeable decrease in pests if you stay consistent with this monitoring and continue preventing measures. Early detection is key; waiting too long can lead to a resurgence of damage. When conducting your inspections, pay attention to not only the foliage but also the overall vigor of the plant; wilting or droopiness can indicate further underlying issues.
Regular inspections allow you to identify signs of reinfestation early on, such as the return of stippling or fine webs on the plants. A fully recovered juniper will exhibit healthy, firm leaves with vibrant color and no new damage signs. If you do see signs of spider mites returning, use a magnifying glass for closer examination to confirm their presence and consider localized treatments. Address any emerging issues immediately to break the cycle. Balancing inspections with preventive removals of any weak or affected leaves will bolster the plant’s overall health.
If signs of spider mites come back despite your efforts, reassess your treatment methods and introduce alternative pest control measures like neem oil or introducing beneficial insects like ladybugs or lacewings, which can effectively bring down spider mite numbers. Increasing the diversity of natural predators in the area can lead to a more balanced ecosystem that naturally lowers pest populations. Additionally, maintaining a meticulous gardening routine—including cleaning tools and avoiding overcrowding plants—can significantly reduce the chances of pests returning to your garden. Ensuring all gardening tools used are sterilized before and after dealing with the affected plants can help prevent cross-contamination. Always dispose of any debris or affected plant parts well from your gardening area to decrease potential continuous infestations.
FAQ
How long does it take for junipers to recover from spider mites?
Junipers can begin showing signs of recovery within a few weeks after proper treatment and care. Consistent watering, along with monitoring for new infestations, will ensure the shrubs regain their vigor within a month or two, depending on environmental conditions. Keep in mind that if significant damage has been done, further interventions may be necessary, impacting the recovery timeframe.
Can spider mites spread to other plants during the winter?
Yes, spider mites can and often will spread to other plants, especially if they are nearby. They can travel easily through the air and by contact with infested tools, so careful monitoring and controlling of all susceptible plants in the vicinity is essential for limiting a larger outbreak. Regular inspections not just on junipers but nearby plants will help prevent cross-infestation. If symptoms appear on other plants, immediately increase surveillance frequency and consider targeting those areas with additional treatments.
Should I remove severely damaged leaves from my junipers?
Yes, removing severely damaged leaves can help prevent the spread of spider mites and allow the plant to redirect its energy towards healthier growth. It’s crucial to prune away the infested sections quickly and dispose of them properly to minimize the risk of recurrence. Leaving infested plant parts can serve as a reservoir for mites to thrive and infect other healthy areas of the plant. Consistent monitoring after removal is vital to ensure other leaves are not affected.